SpringBoot热部署
SpringbootSpringboot约 349 字大约 1 分钟
IDEA2023版本整合SpringBoot热部署
1.前言☕
今天来讲讲IDEA2023新版本如何配合SpringBoot使用热部署工具。
2.引入依赖
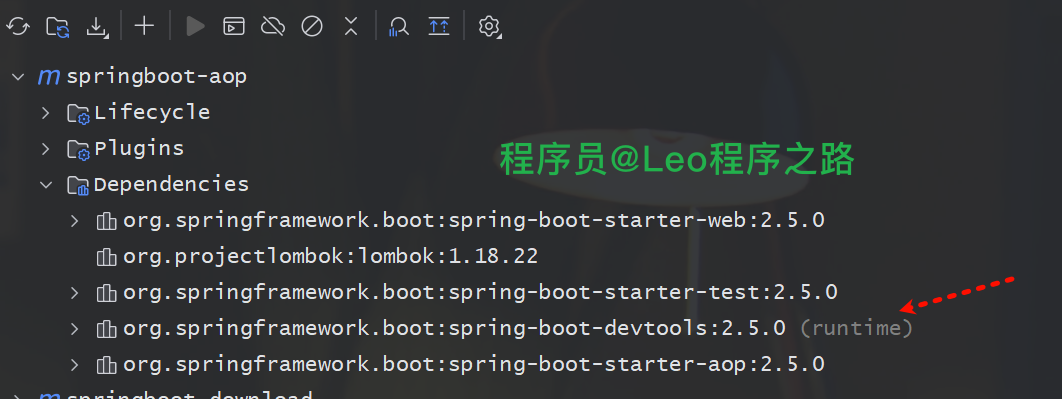
在我们的SpringBoot中引入pom依赖。
<dependency>
            <groupId>org.springframework.boot</groupId>
            <artifactId>spring-boot-devtools</artifactId>
            <scope>runtime</scope>
 </dependency>
注意:加入依赖后别忘记刷新Maven哦。
这里可以看依赖是否下载成功
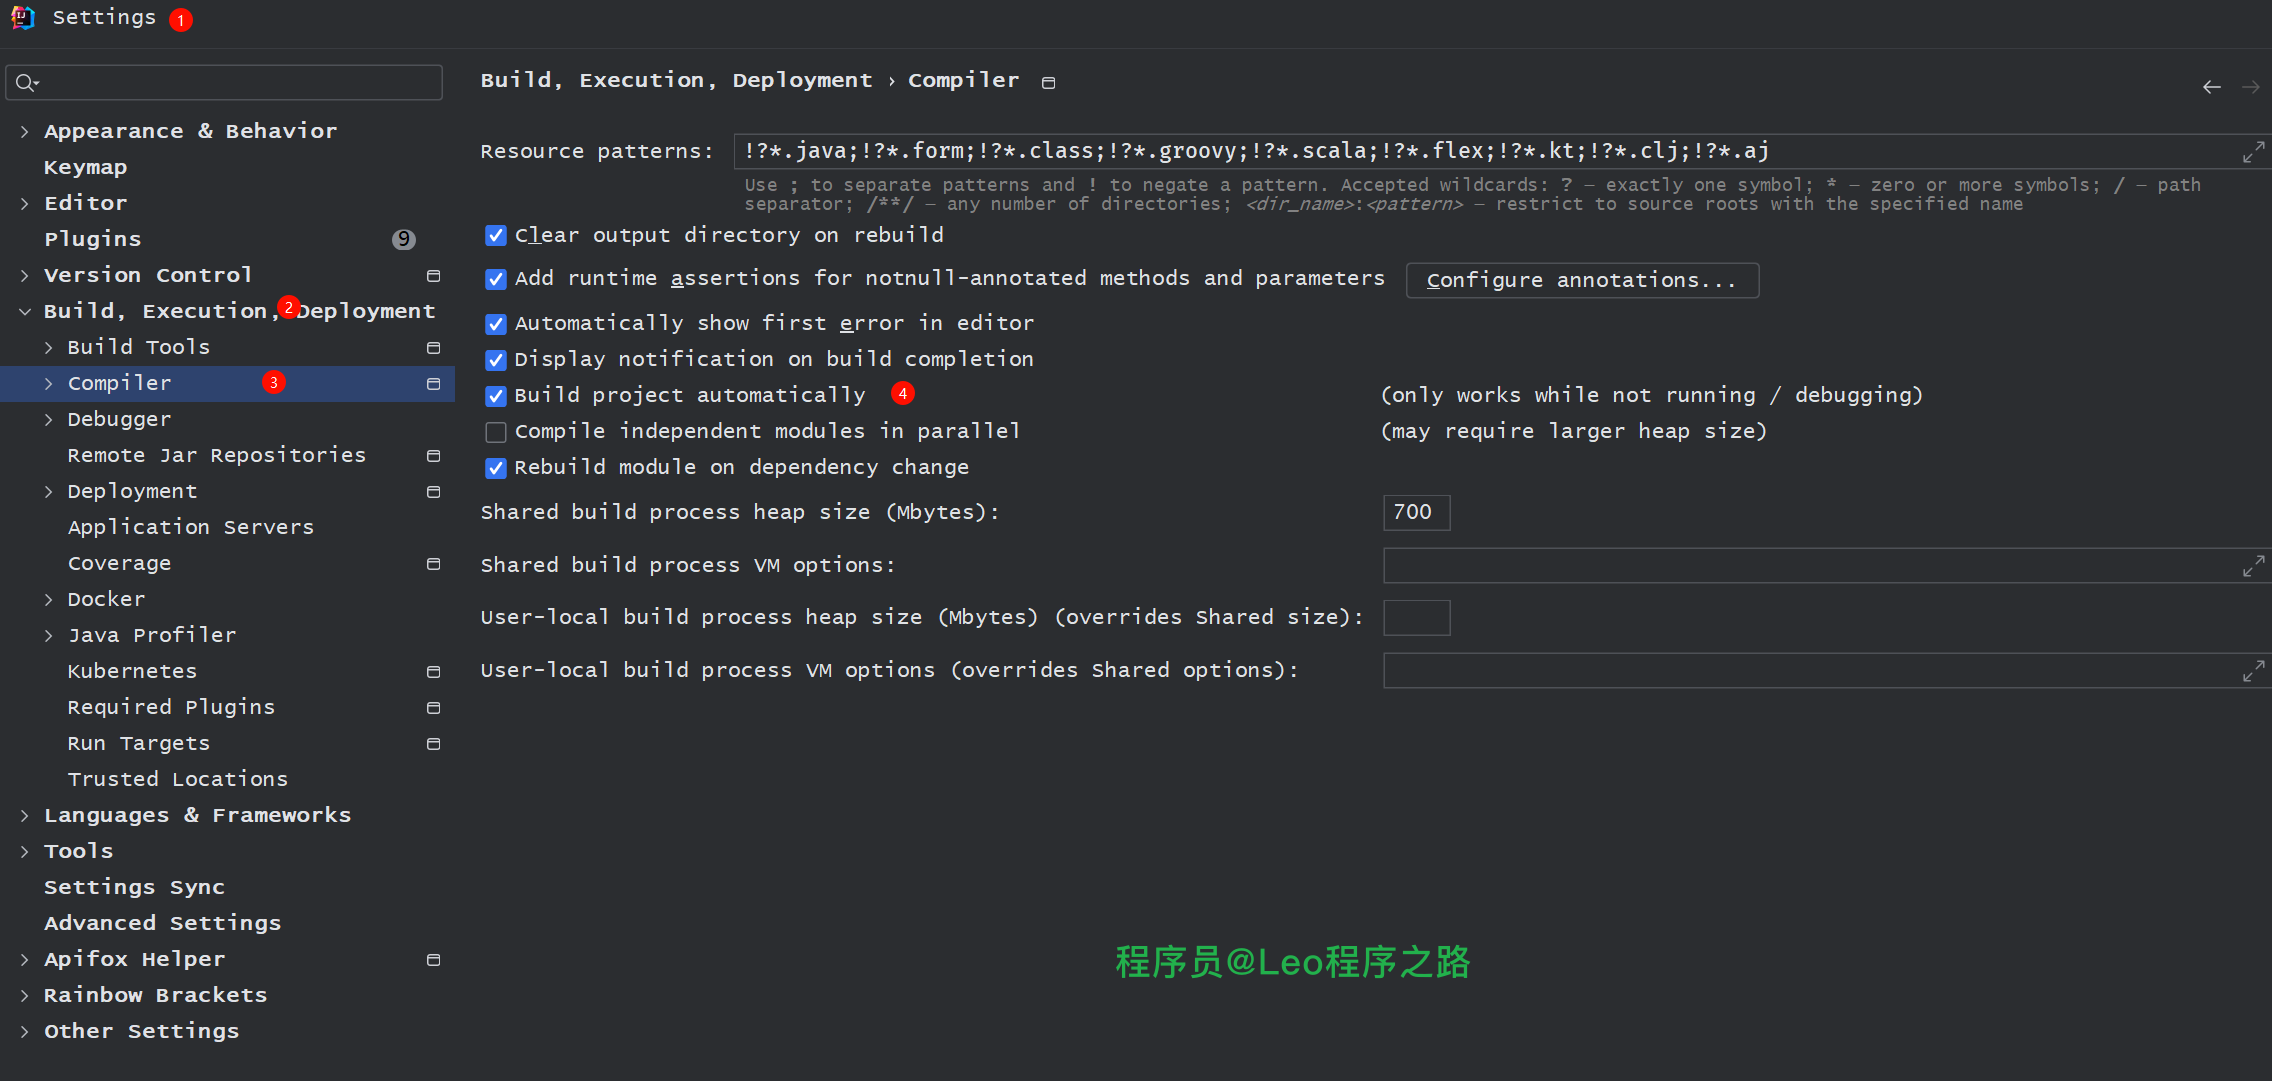
3.配置项目自动编译
勾选: settings->Build,Excecution,Deployment->Compiler -> build project automatic,点击apply
勾选:settings-> AdvancedSettings -> Compiler -> 编译器中的第一个选项,如下图,点击apply

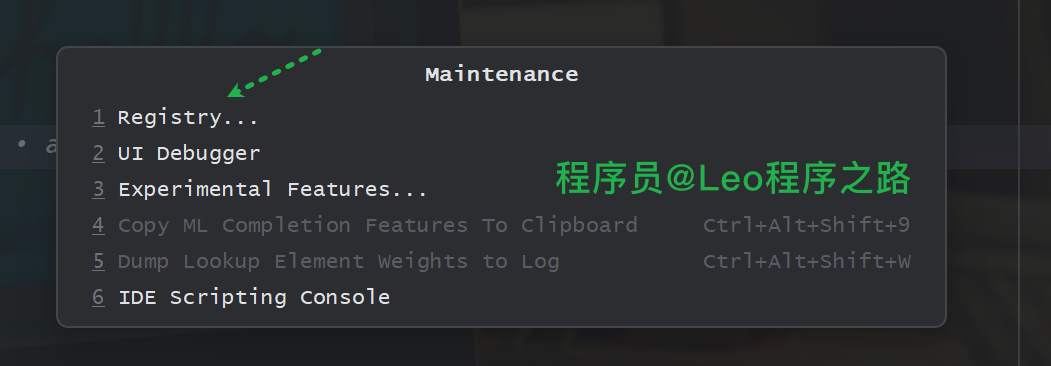
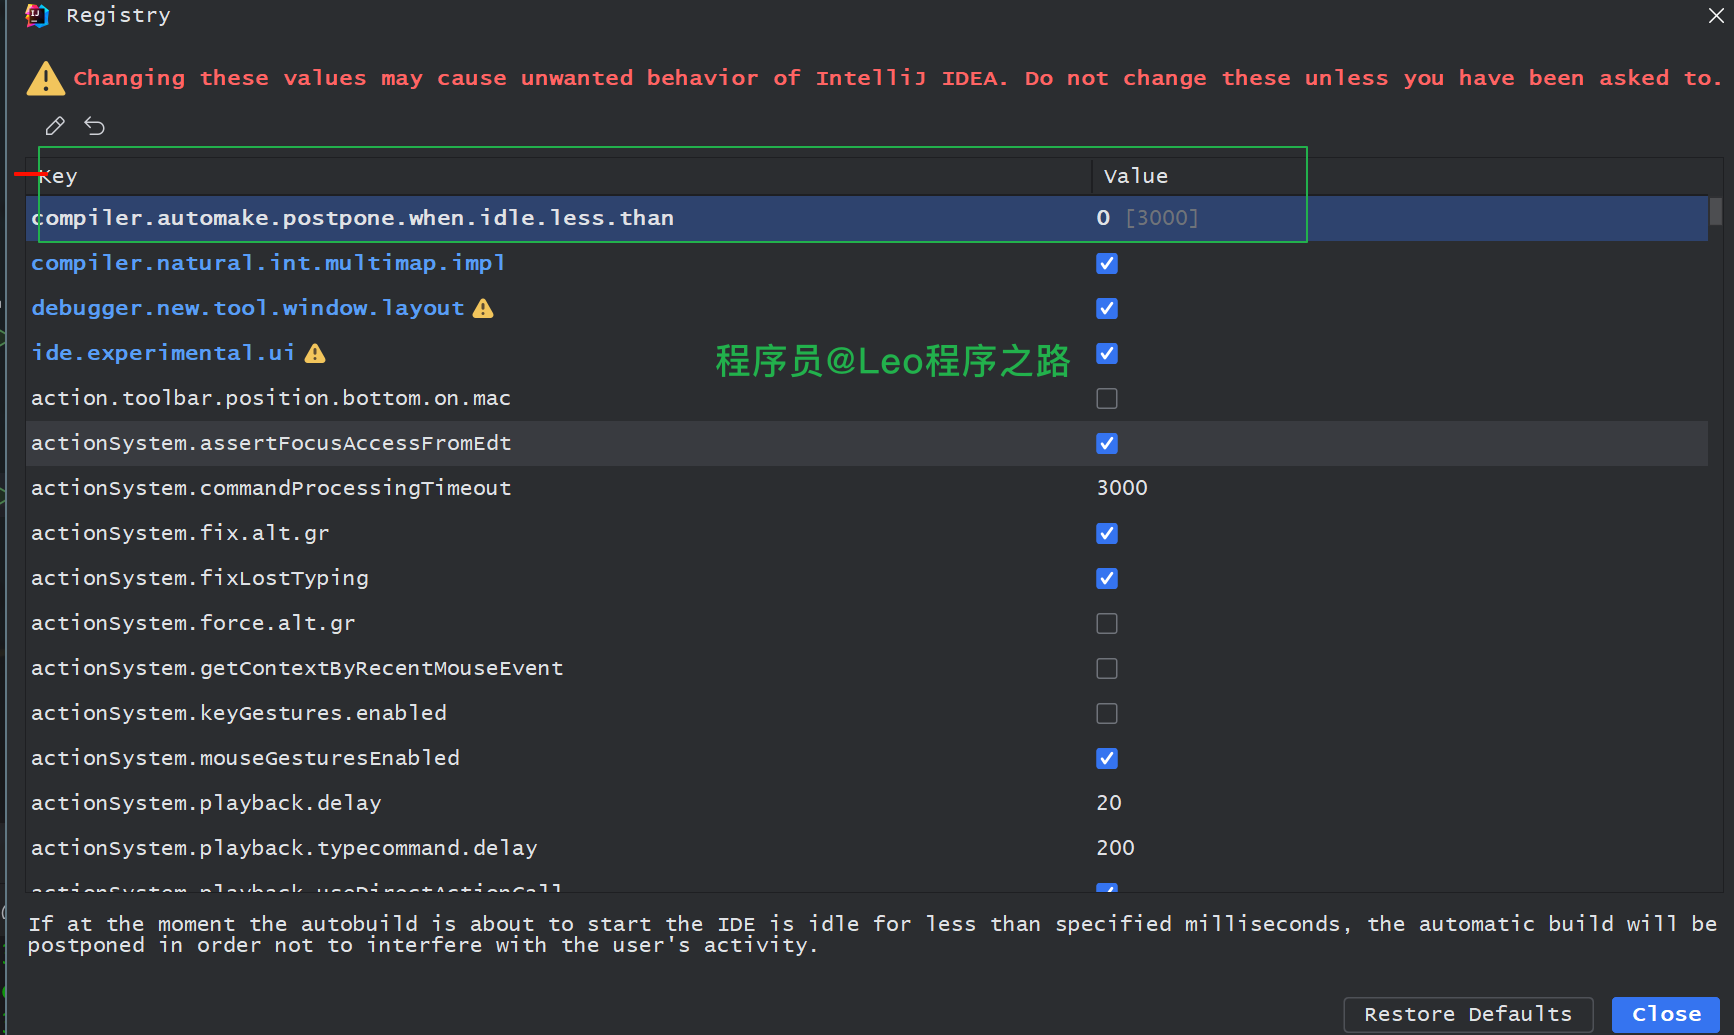
按住 ctrl+shift+Alt+/ 四个键,点击-> Registry-> compiler.automake.postpone.when.idle.less.than 后的value值设置为0;
4.重启项目测试
看到启动日志中的 restartedMain 就说明我们配置已经生效了。

5.总结
以上便是本文的全部内容,本人才疏学浅,文章有什么错误的地方,欢迎大佬们批评指正!我是Leo,一个在互联网行业的小白,立志成为更好的自己。
如果你想了解更多关于Leo,可以关注公众号-程序员Leo,后面文章会首先同步至公众号。